Quotes

Life is short, break the rules. Forgive quickly, kiss slowly. Love truly, laugh uncontrollably and never regret anything that makes you smile. - Samuel Longhorne Clemens (Mark Twain)

Friday, January 31, 2014

Calamity gets a Watertank - Banta Modelworks

I took the plunge and ordered the watertank I wanted with a little bit of Christmas money. This is an On3 watertank from Banta Modelworks. Its a $45 kit plus shipping which sounds expensive but its definitely in line with some of the laser cut kits I see from the gaming manufacturers and I much prefer the extra detail that comes with a model railroad kit. I took some time at lunch to get started on it. Its usually a good idea when working with a wooden kit like this to pre-weather the wood components. I figured I could do that to the stripwood and it would have a chance to dry since I won't have time to start the build until tonight. Yep, pretty excited about this one. After this I'll probably go ahead and start working on Calamity's railroad station.


Now that's a lot of parts!

Pre-staining the stripwood. Its not a good idea to pre-stain the sheet wood parts as they may warp.

Wednesday, January 29, 2014

The next victims...er citizens for Calamity

I'm in that never ending cycle of painting more western miniatures for Calamity. This time around I'm concentrating on by-standers, those normal everyday citizens that are not likely to be armed although they certainly may catch a bullet now and then.

This batch contains a couple sets from Knuckleduster and another pack of Wargames Foundry. Got them all prepped and primed yesterday and even managed to get started on the skin tones last night. Just in case I get to bored with this bunch I still have some gunfighters ready to paint as well. Hopefully I'll make some significant progress over the weekend on these.

The one thing I do wish is that someone would spend some time sculpting some nice female western figures. The Knuckleduster ones aren't bad and there are a couple of nice ones in the Reaper, Black Scorpion and Wargames Foundry lines. But I really need some women without guns both your regular everyday citizen types as well as a better selection of soiled doves.

Here is what's on the table:
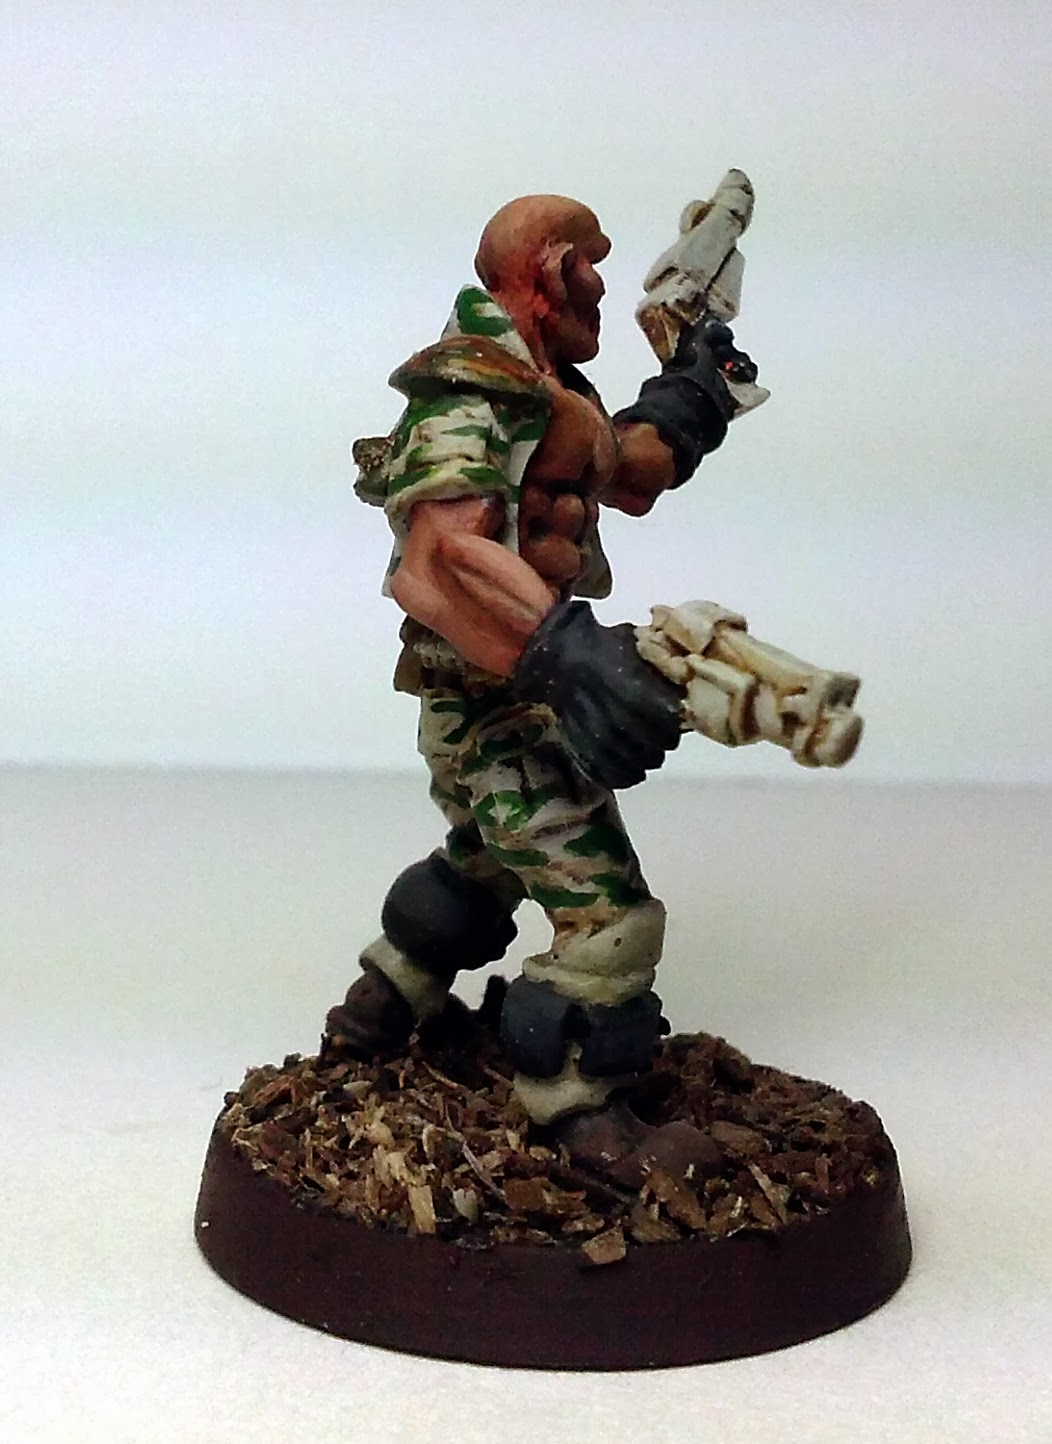
Knuckleduster OW28-306 Pioneer Women


Knuckleduster OW28-304 Working Men


Wargames Foundry  OW11/1 Town Traders pack
This pack was a little odd. It is suppose to have 6 minis in it, but mine had 8. It included a double of the Doctor and the Fiddler from OW11/5  Just Passing Through pack. I figure Calamity is probably going to need at least 2 doctors anyway.


Tuesday, January 28, 2014

New Paints - Scalecolor - First Impressions

First, just let me be clear that this is not a review, it really is just my first impressions of these paints. I have a number of friends that have started using these new paints from Scale 75. Right now they just come in sets of 8 colors. I imagine individual colors will be available soon, I can certainly see running out of some of these colors and not others. I started off with two sets the Flesh set because I paint a lot of skin and the Green set, well because I like green.

These are not set-up in triads like the Reaper Master Series paints or the Wargames Foundry paints, so be prepared to remember your color theory! Each box of eight colors has shades that run from dark to light, although you are not likely to use all of them in typical shading and highlighting exercise. Each box comes with a sample use of the paints specific to the set. There are two different step by step examples for you to work through. I find the translation to be particularly bad although its mostly understandable if you are willing to read it through a couple of times and pull the colors while you are doing it. The paints can be used in an airbrush and the instructions seem to be written for an airbrush user so pay attention.

These paints come out quite thick, they rival and even exceed Vallejo Model Color in thickness coming out of the bottle. They thin easily though and don't seem to separate like other brands when thinned. They definitely need to be thinned way down when used through an airbrush. There are a number of youtube videos out there and some are by Scale 75 using the paints through an airbrush but no real tutorials yet. These dry dead flat to, these are probably the mattest paints I have ever used.

I'm still learning to use them at this point, so I don't have any hints of tips yet and I really haven't found any on the internet. The Scale 75 examples are not particularly good, they don't go into any step by step techniques although they are fun to watch.


Wednesday, January 22, 2014

Kickstarter Loot - Serious Loot!

It has arrived! The Walter Koessler book has finally made it. I have been more excited about this Kickstarter than any of the other ones I have backed to this point. Its especially poignant with the 100th anniversary of WWI coming up. Some truly amazing pictures in here it really does detail the whole life of some these soldiers from the beginning of the war to the end.

Here is a look at a few pages
Opening the box

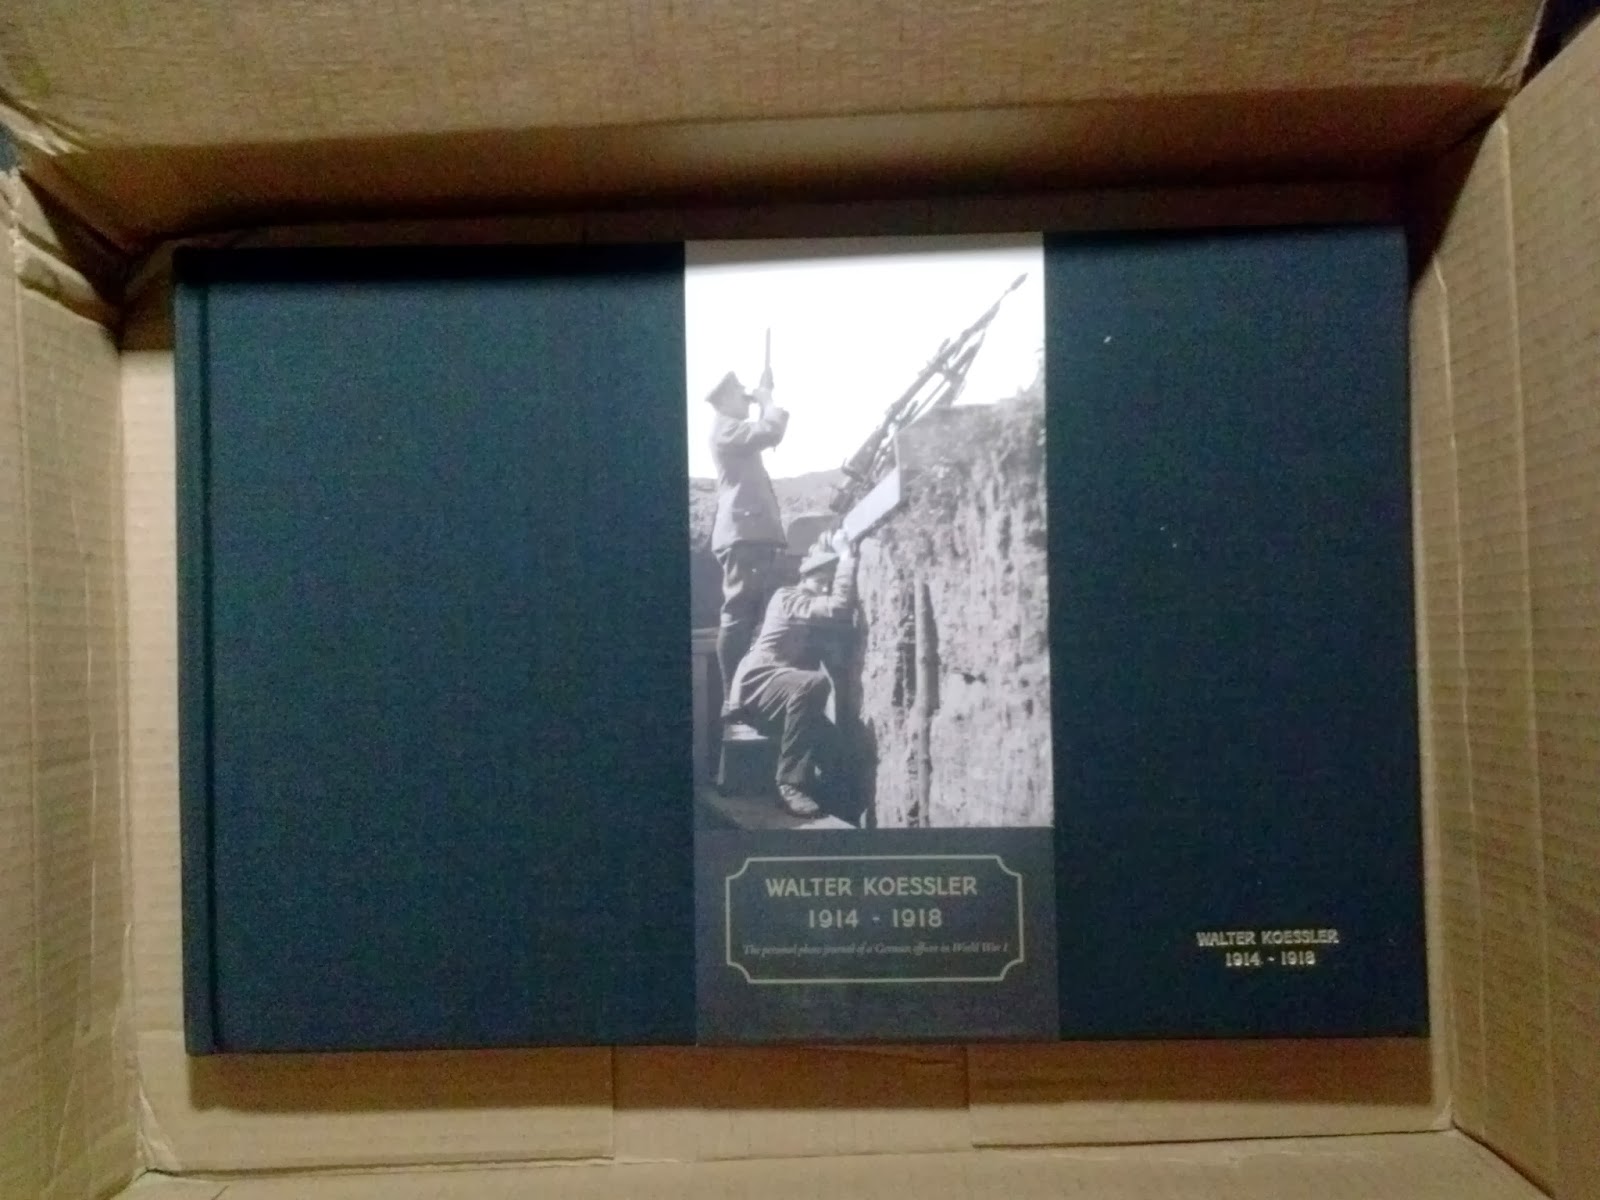
There is the book, with my request book band (its not part of the book, it slides off).

Most of the pages are like this. A scan of the original album page and on this one a couple of enlargements and a bit of description.
The best part of are some of the pages are full sized enlargements of the smaller album pictures. Easy to do since they family maintained the original negatives in such good conditions.


Sunday, January 19, 2014

Calamity - Newspaper Office - Finished...for now

I have finished off the Newspaper Office for the time being. There is some additional weathering I want to do but I won't do that until its on its base and I'm working on the board. I want everything to blend together on the board so final weathering and some details will wait till then. Its definitely part of the project that I want to get to this year. I need to revisit my little working model of Calamity (which I have managed to misplace) and play with the arrangement a bit more as well as add in some elevations. I want Calamity itself to be on a slope which will require some additional foundation work on all the buildings.

Lessons Learned!
This is the first building I have built entirely from styrene plastic (well outside of an actual kit). Everything else I have scratchbuilt has been from combinations of materials; wood, cardboard, matt board and styrene.
The construction itself was pretty straight forward so most of my lessons revolved around painting it.

1) Measure twice, cut once (classic rule). The only mistake I really made along this line was on the roof and not making it overhang the eaves enough. I was able to work in another course of shingles that hide the edge, but it could have been avoided by simply double checking before I cut the plastic.

2) Think everything through before you start. I made some notes on construction before I started but I left some things kind of hanging and those came back to haunt me a bit. Most of this revolved around the addition. I initially planned to assemble the walls with the long walls overlapping the shorter walls. Somehow I managed to reverse that when I actually assembled the building resulting in the floor not being the right dimensions and I had to re-cut it so it wasn't as wide and a little longer.

3) Weathering undercoat. Since the styrene is so smooth even with primer, my liquitex inks even with a bit of paint had a hard time taking hold. Next time I will lightly sand both sides of the styrene to add a bit of tooth to the plastic for the paint.

4) Peeling paint 1. While the peeling paint effect worked quite well in some places, notably the lighter colored trim, it was almost invisible on the red siding. Pay attention to your colors so you can maximize the effect. Also, because of the lack of tooth on the plastic, in many spots when I peeled paint I went right down to the plastic. Next time I will do the undercoat and then give it a coat of dullcoat before applying the chipping fluid.

5) Peeling paint 2. I used my tried and true rubber cement, which did not work well on this model. Next time I'll either use hairspray (applied by brush) or the chipping fluids I have from AK Interactive.

6) Paint everything inside first! I know this in the back of my head and then ignored it in the excitement of the build. Its easier to paint everything inside when it is laying flat on the table rather then when its completely assembled. While I did remember this for the inside, I discovered that when I wanted to change the color I couldn't really get a brush in where I needed it after I had assembled the walls. Also the doors and windows would have been much easier to weather and paint if they weren't glued in place. I guess these are lessons re-learned.

7) Paint splatter! I don't know why I didn't think about it but I should have taped over all the window openings when I was painting the building. I had paint splatter all over the inside of the building, mostly on the light textured wallpaper. I was able to match the paint and cover most of it and it doesn't look to bad. This especially true if you are going to be using and airbrush to apply the exterior paint which is what I usually do (also apply exterior paint before putting the windows and doors in).

8) Remember to remove paint from the places where things need to be glued together. I actually remember this but its a good thing to point out when working with styrene. I prefer to use Plastruct Plastic Weld (the good toxic stuff) which can really attack paint, so think ahead a bit.

In the end I'm pretty happy with the building. While it may not be the true "Hero" building that I had in mind it looks good and reminded me of what I needed to do when working on one of these. Right now I'm looking at doing three more buildings; a corner saloon/hotel, the railroad station and the bakery (I only refer to this as a bakery because the original building is currently a bakery and prior posts refer to it that way). I may do a couple of others, but these take a lot of time so I still intend to use my MDF laser cut buildings to fill in the rest (and the bulk) of Calamity

On to the pictures!
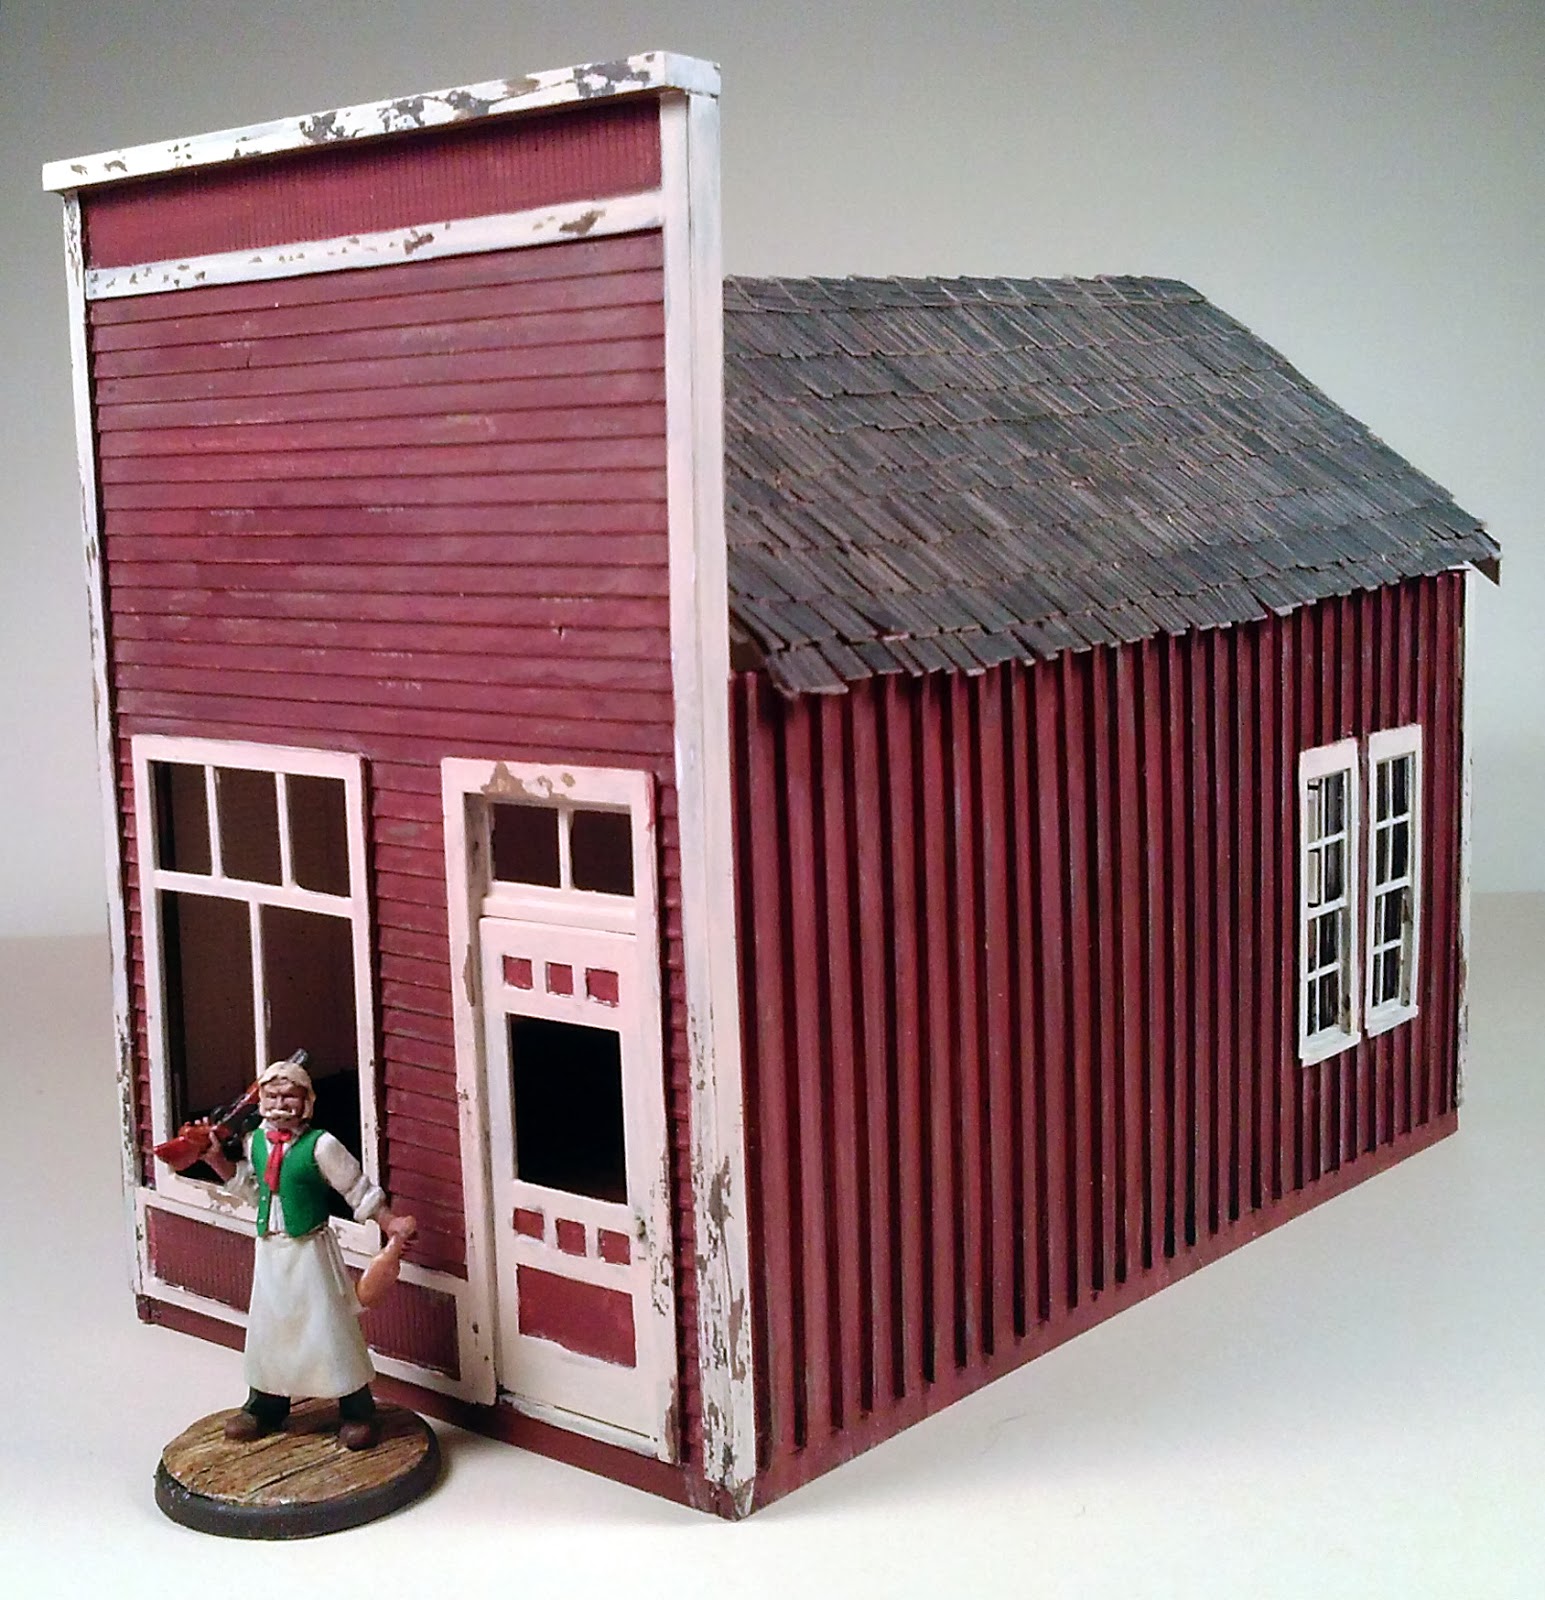
The Newspaper Office with a brand new citizen out front. The red is a little dull in this shot.

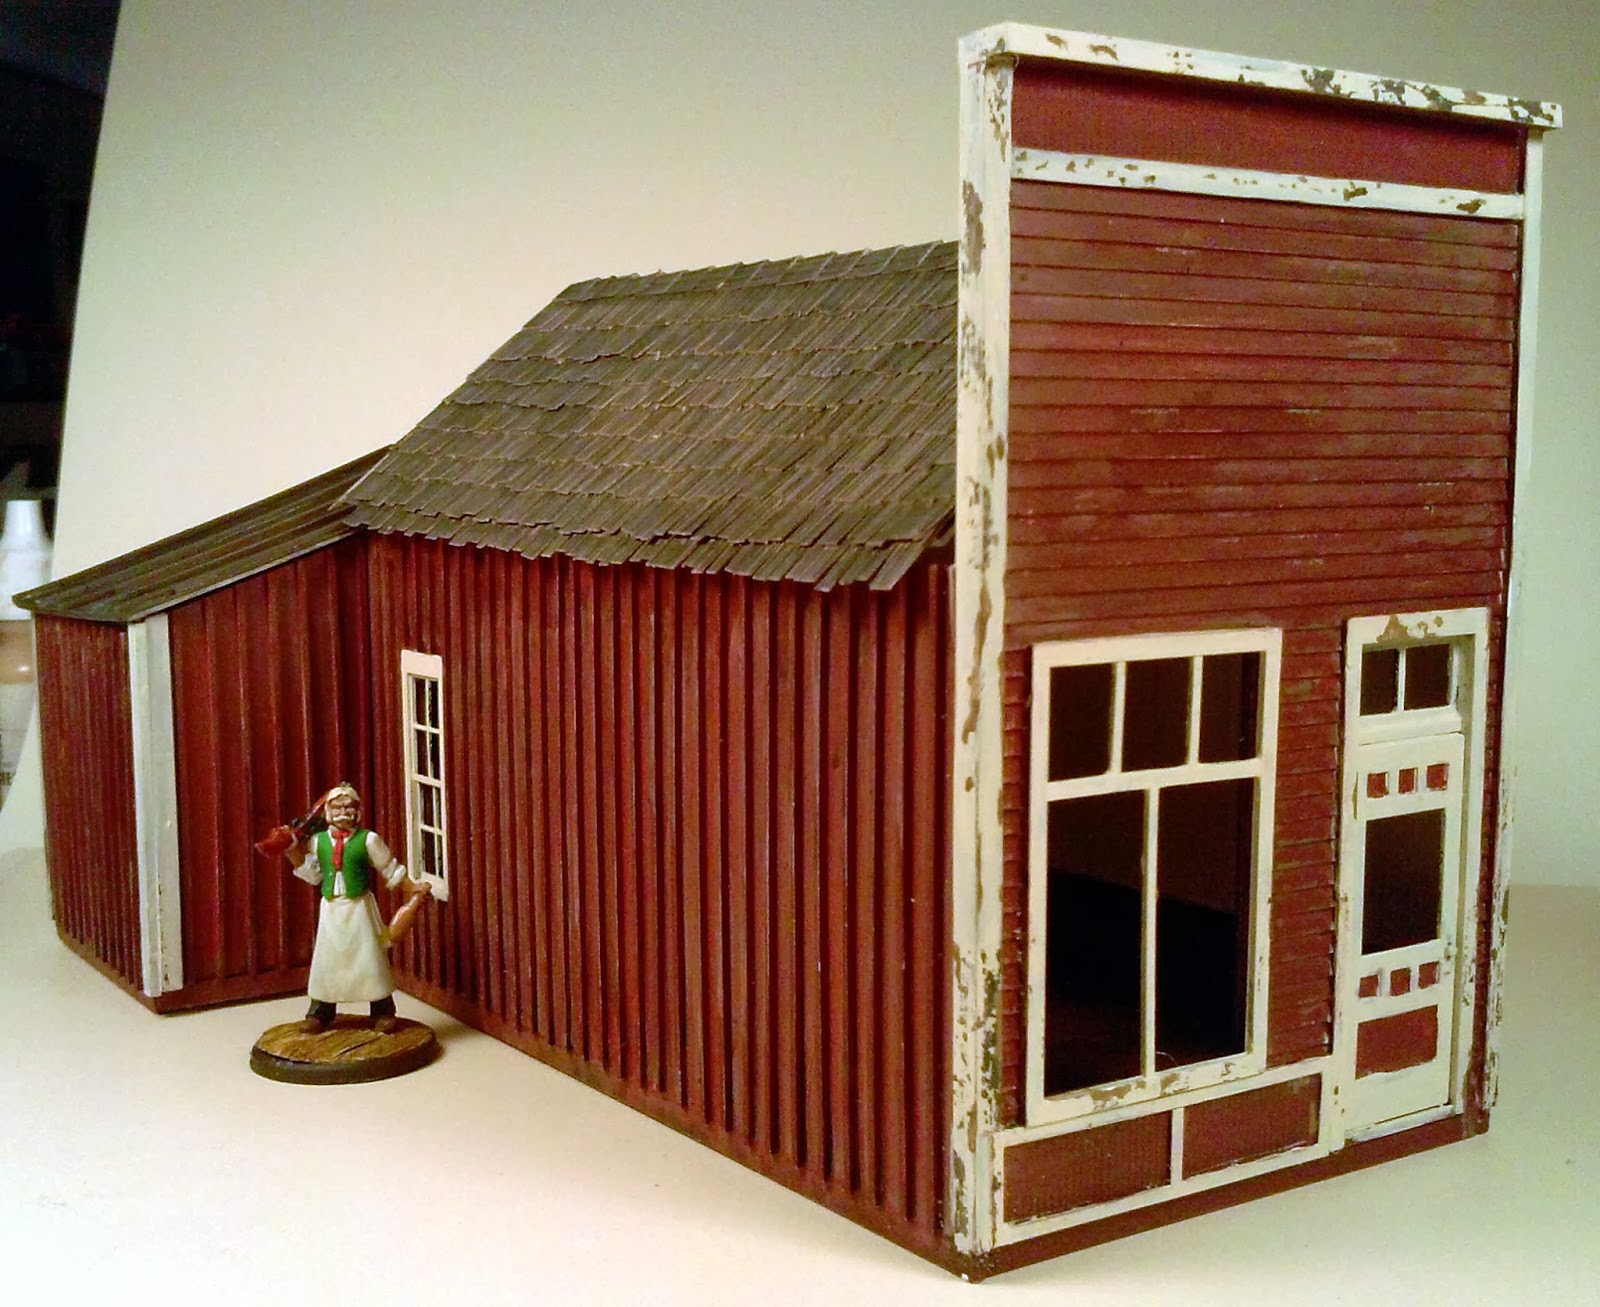
This is much closer to what the red looks like in the "flesh"

A close up of the peeling paint affect. The darker wood is the original weathered undercoat, the lighter wood is done with a brush to give a little contrast and to cover up the plastic that was exposed when I "peeled" it.

And yes, I didn't paint the back of the false front, that is deliberate.

The emergency exit, or perhaps a good spot for an ambush.

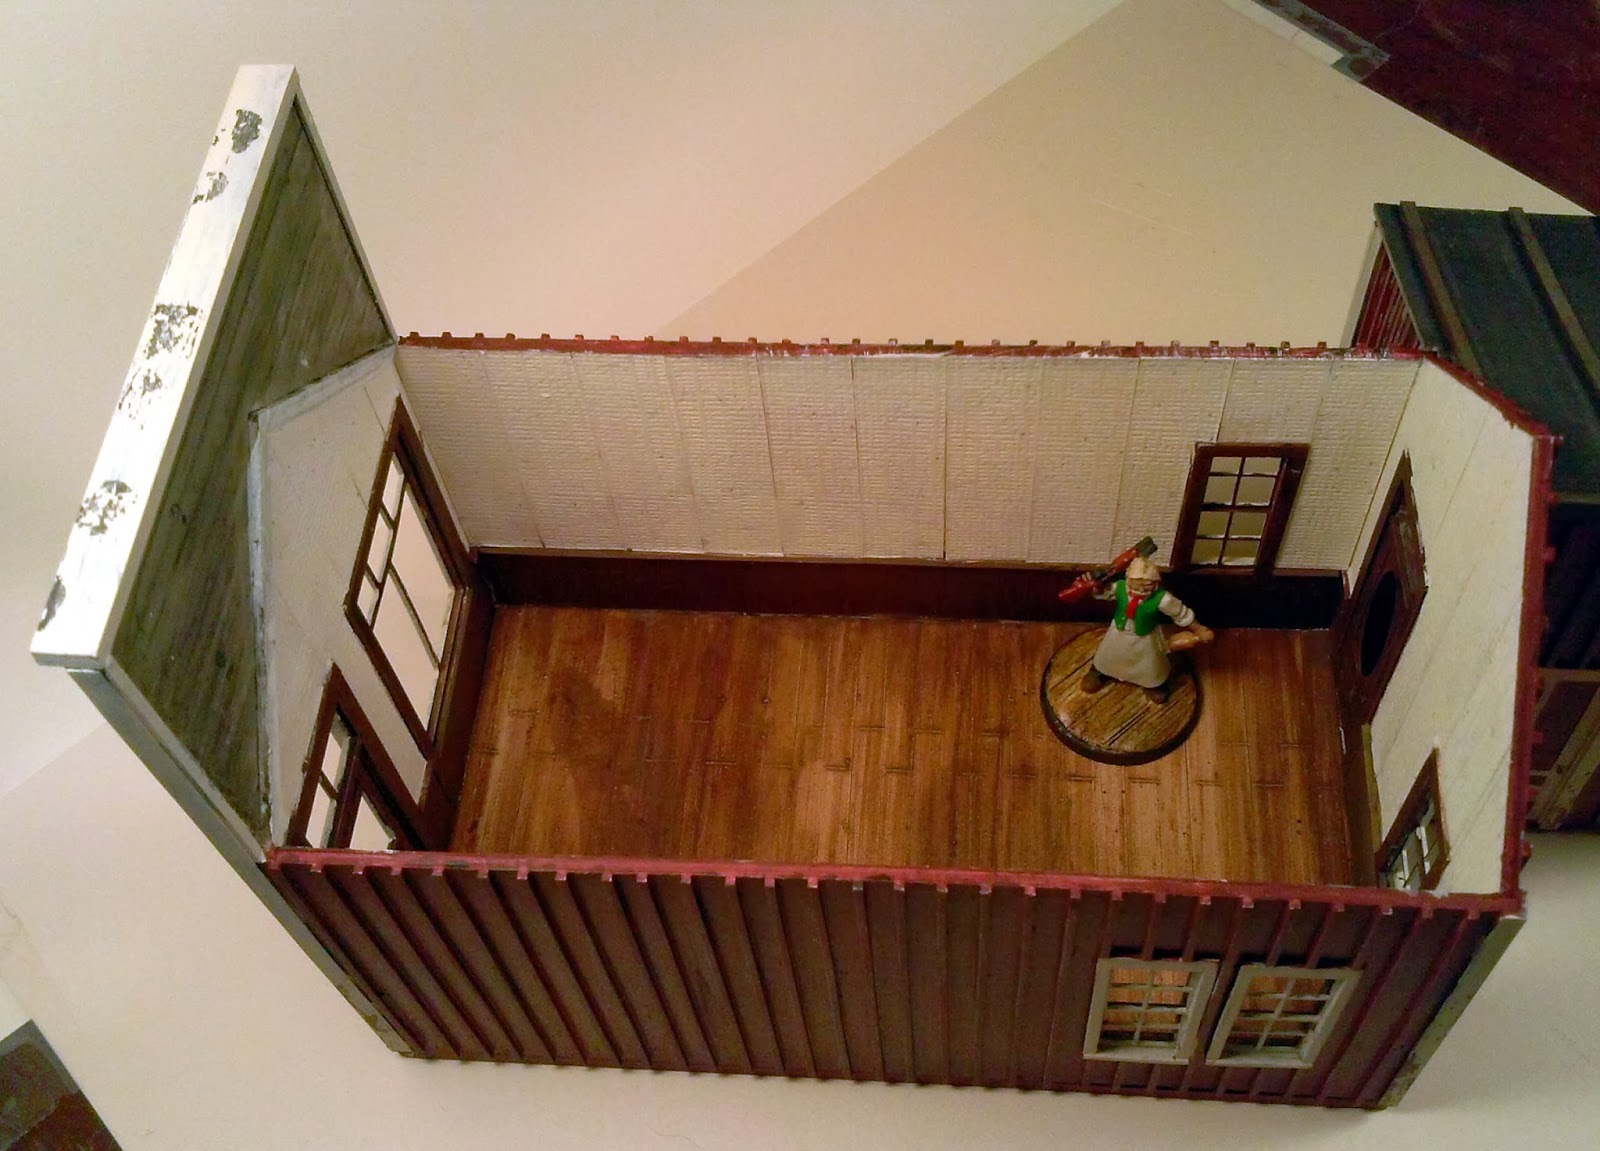
The interior, I like the color variation in the floor. I have no idea of I'll be able to pull that off again. Remember to paint with the grain and pull your brush all the way across in one stroke.

The addition. Its not really that bright, its small so its really reflecting the light from the lamps.

The roofs

A foot print shot


Saturday, January 18, 2014

Lead Aventure, Lead Apocalypse Entry

I have been hanging out on the Lead Adventure forums a lot lately, mostly because they have a dedicated Old West board. Part of the spurt to get so many Calamity citizens finished was to post in the Wild West Painting Posse thread, kind of a painting club, but with a maximum of 100 entries allowed. There is a new painting club running the Lead Apocalypse club featuring post-apocalyptic miniatures, with the restriction that the entry had to be human or mutated human. So I decided I would try and get a figure done for this one, they were already at 70+ entries when I found out about it. I rummaged through my miniatures and found a suitable Reaper mini, 4 hours or so later I had mine done and posted him to the forum.

By admission he is kind of a rough and ready paint job, certainly acceptable for table top use though. I could have been a bit more precise with the camouflage on the paints and the shirt though. I also tried to give the metal armor a rusted look, which I think utterly failed. I may go back and try and fix that.

So here he is #74 Boris Barayev, from Reaper Miniatures. #50002 in the Chronoscope line (it was even still in the original packaging with the yellow Pro Counters card (the Chronoscope cards were not ready for the initial release at ReaperCon so my first three all have the yellow Pro Counter card on the back).


Friday, January 17, 2014

Kickstarter Loot

Some of the "loot" from Kickstarters I have supported has started to trickle in. Like most Kickstarters these delivered late, 6 months for the Elmore book and the Foglio books about 4 months late. Really not bad in the grand scheme of things.

I purchased two of the Elmore books in case someone in my gaming group decided they needed a copy after they saw my copy. We hit a stretch goal to add the B&W sketch book along with lots of extra pages in the main book. The Foglio Girl Genius comics is one of the few online comics I follow. This one let me catch up on five books that I was missing along with a hardback edition of volume 12.

I received a shipping notice on the WWI pictorial as well, it should be arriving next week. Pretty excited about that!

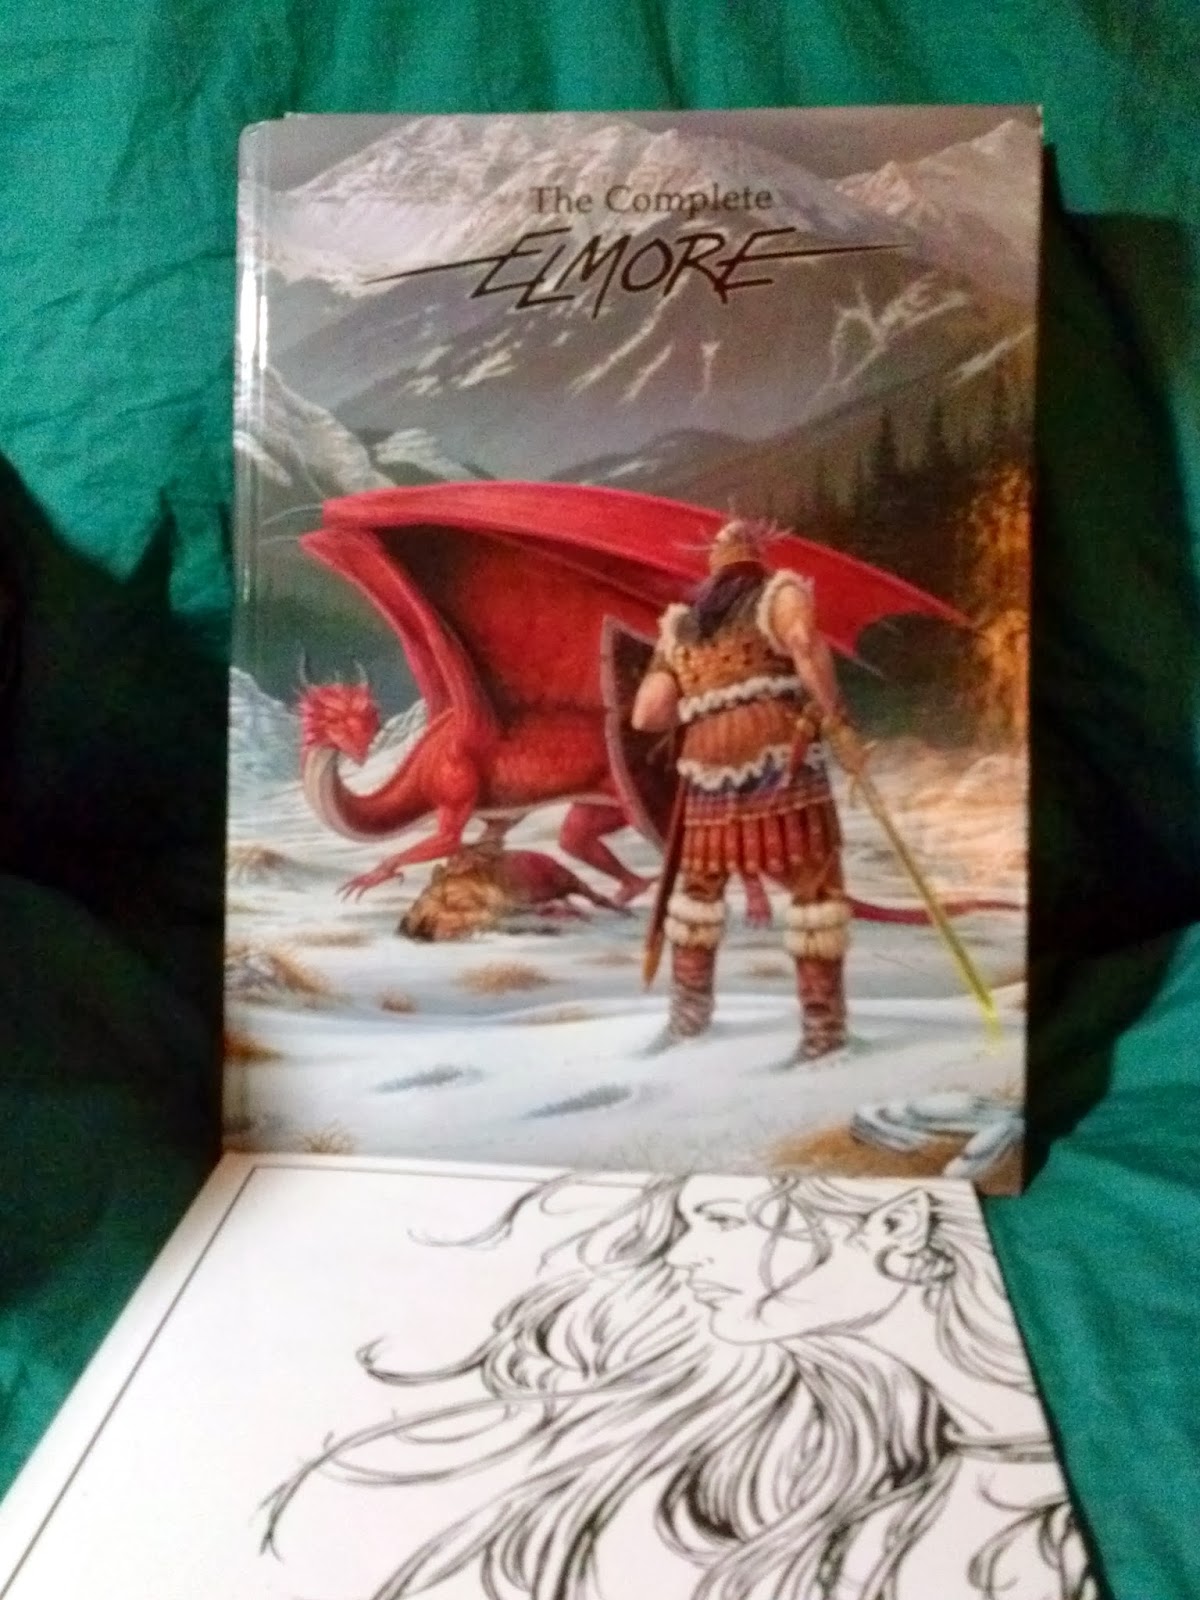
2 copies of Elmore plus the B&W sketch book

Girl Genius Extras, books 7 -11, unfortunately softbacks

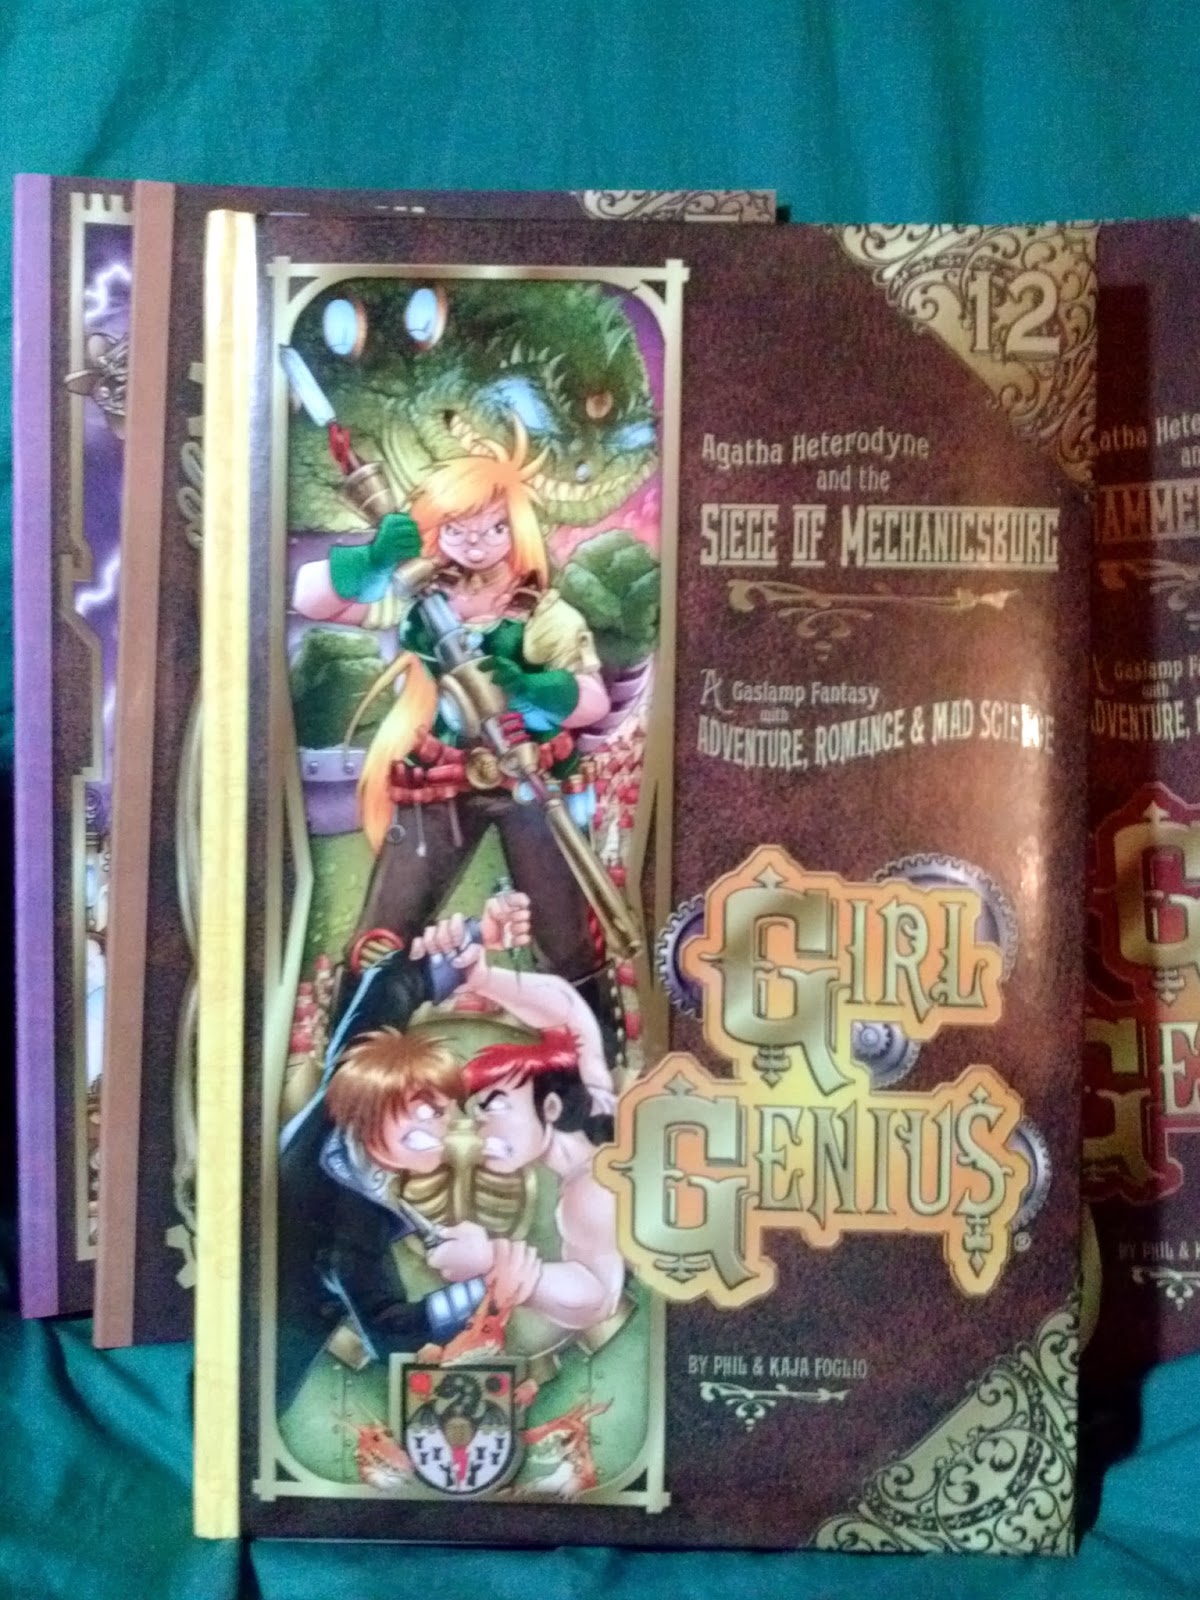
New volume 12 in Hardback!


Tuesday, January 14, 2014

Calamity - Newspaper Office - A few coats of paint

I was able to get some work done on the Newspaper office. I'm not terribly sure I'm happy with it and I think the red is to dark to really let my paint peeling technique really pay off.

I started with a new undercoat. This is the first coat of paint I put on and its suppose to represent weathered wood. I like the color that I arrived and I think I can modify it a bit to get some variations without to much trouble. The issue I had is that the Liquitex ink really has a hard time adhering sometimes, even when combining it with a bit of paint over a primed surface. In this case I had primed all the exterior walls in white and I was still getting some beading up of the mix, which required almost scrubbing it on to the walls. So perhaps more effort than its worth, but I think I will continue to experiment with it a bit. I used 1 part Liquitex White, 1 part Liquitex Carbon Black and 1 part Liquitex Raw Umber along with some matt medium to act as a bit of a binder.


After that had dried I applied rubber cement in random patches on all the exterior walls but mostly towards the bottom edges of the walls. I painted the main wall color over this. This was 4 "drops" of Vallejo Shadows Flesh from their Panzer Aces line along with 2 drops of Liquitex Naphthol Crimson and thinned it down a bit more with water. I like the color, kind of like a box car red (of which there are many variations).


The last step tonight (well after I painted a little bit of the trim) was to fade it. I used very thinned down Liquitex white and applied it in strokes following the "grain" of the wood. I over did this in more than a couple of spots and on the front, I actually managed to expose white primer on the edges of the clapboard siding. I'm not sure if I'm going to go in and fix that or not. I'm also undecided if I liked what I did. Where it was really over down I went back in and made a lighter version of the base color and went back over it (and pretty much the whole building). The lighter version was 4 drops of Vallejo Red Leather, 2 drops of Vallejo Shadows Flesh and 2 drops of Liquitex Napthol Crismson.

The trim all needs one more layer of paint and needs to be neatened up on the doors in particular. I saved all actual wood trim for later.


I think I need to sleep on it at this point and I'll decide whether I like it or not after I have stepped away for a bit.